I received a handmade card from my girlfriend the other day and I had not seen this layout before, it's like a card within a card. I really liked it so I thought I'd make one. After checking out the card, the dimensions are really simple and easy to do. The fun part is coordinating the colors and embellishing. I made a few birthday cards for some friends that have February birthdays and thought I would share some pictures of the cards I made. There are 3 pictures per card so you can see the card closed, and the internal card open.
The card base is cut to measure 8.25 X 4" and is scored at 3"
The smaller internal card is cut to measure 8 x 3.5" and is folded in half at 4".. The internal card is attached to the inside of the base card. Important ->The internal card opens to the right instead of the normal opening to the left.
As you can see in this picture the base card opens to the left and the internal card opens to the right. That's all there is to it, now you embellish it to your liking. For this card I added a flower and rhinestone and cut a piece of designer paper for the front fold. I used an embossing folder to emboss just the back of the base card. The embossing made the base card kind of flimsy so I added a backing to the base card that measures 4.25 x 5.5 which allows the card to still fit in the standard A2 envelope.
The next card is also a birthday card for my dear freind who turns 91 in February. I added a few butterflies, one to overlap the opening. I added designer paper to the front and did not add a backing sheet. This card is very simple and clean, not alot of embellishment.
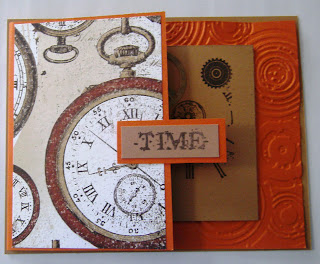
One last example, this birthday card was made for a male. Like the butterfly, I added the work TIME to overlap the opening and added a gear on the inside card for embellishment. Designer paper for the fold and a backing sheet.
Once you make this, you'll see how easy it is and fun to coordinate with designer paper and cardstock and fun to embellish. Thanks for taking the time to stop by and check out my project.


